How to add a map to Framer
Framer is an amazing tool for creating websites quickly, even without any web development experience. However, it still doesn't have built-in support for maps. In this guide, I’ll show you how to add an interactive or static map to your Framer website using MakeMeMap—a simple solution that takes just a few minutes to set up.
How to Add an Interactive Map to Framer
- Go to makememap.com and create an account if you don’t have one yet.
- In your dashboard, click the “New Map” button.
- Choose your preferred map style.
- Add locations, overlays, and adjust other settings as needed.
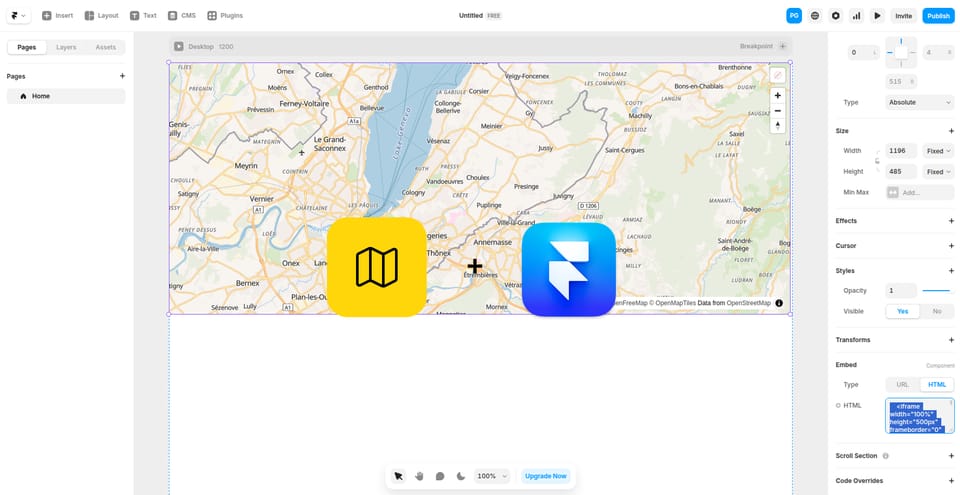
- Click “Publish” and copy the HTML embed code.
- In Framer, go to your project and click on Insert → Utility → Embed.
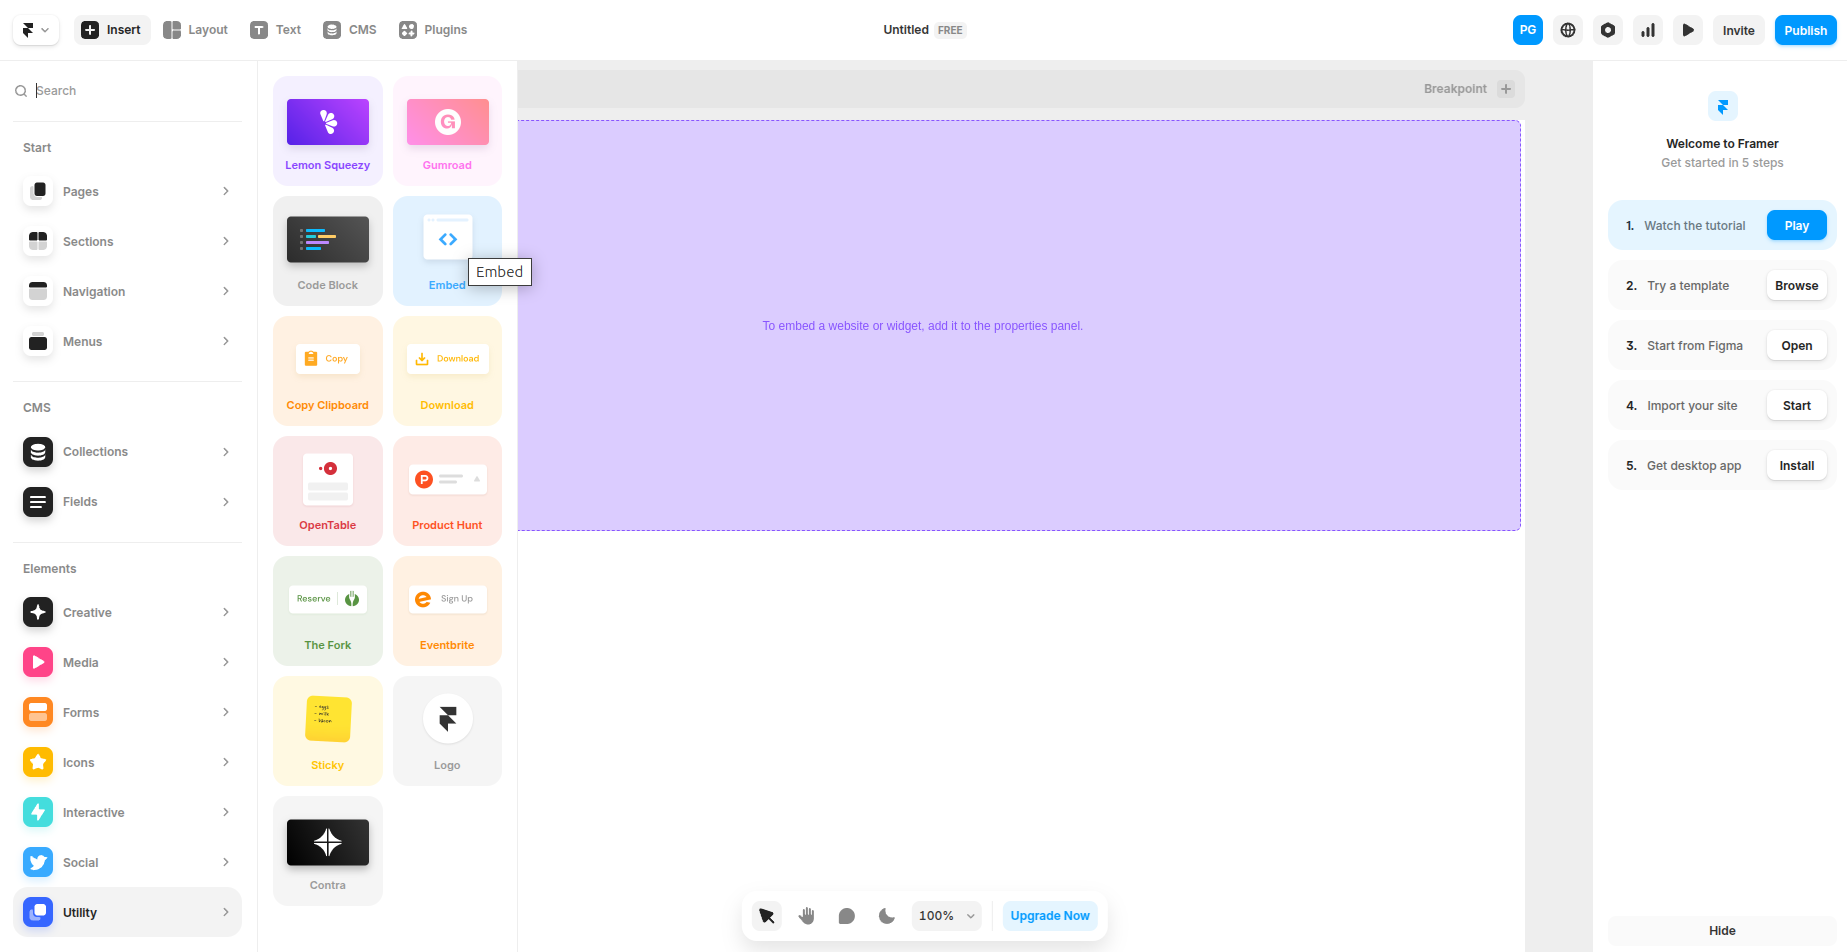
- Place the Embed block where you want the map to appear.
- In the right sidebar, click HTML under the Embed section and paste the code you copied in step 5.
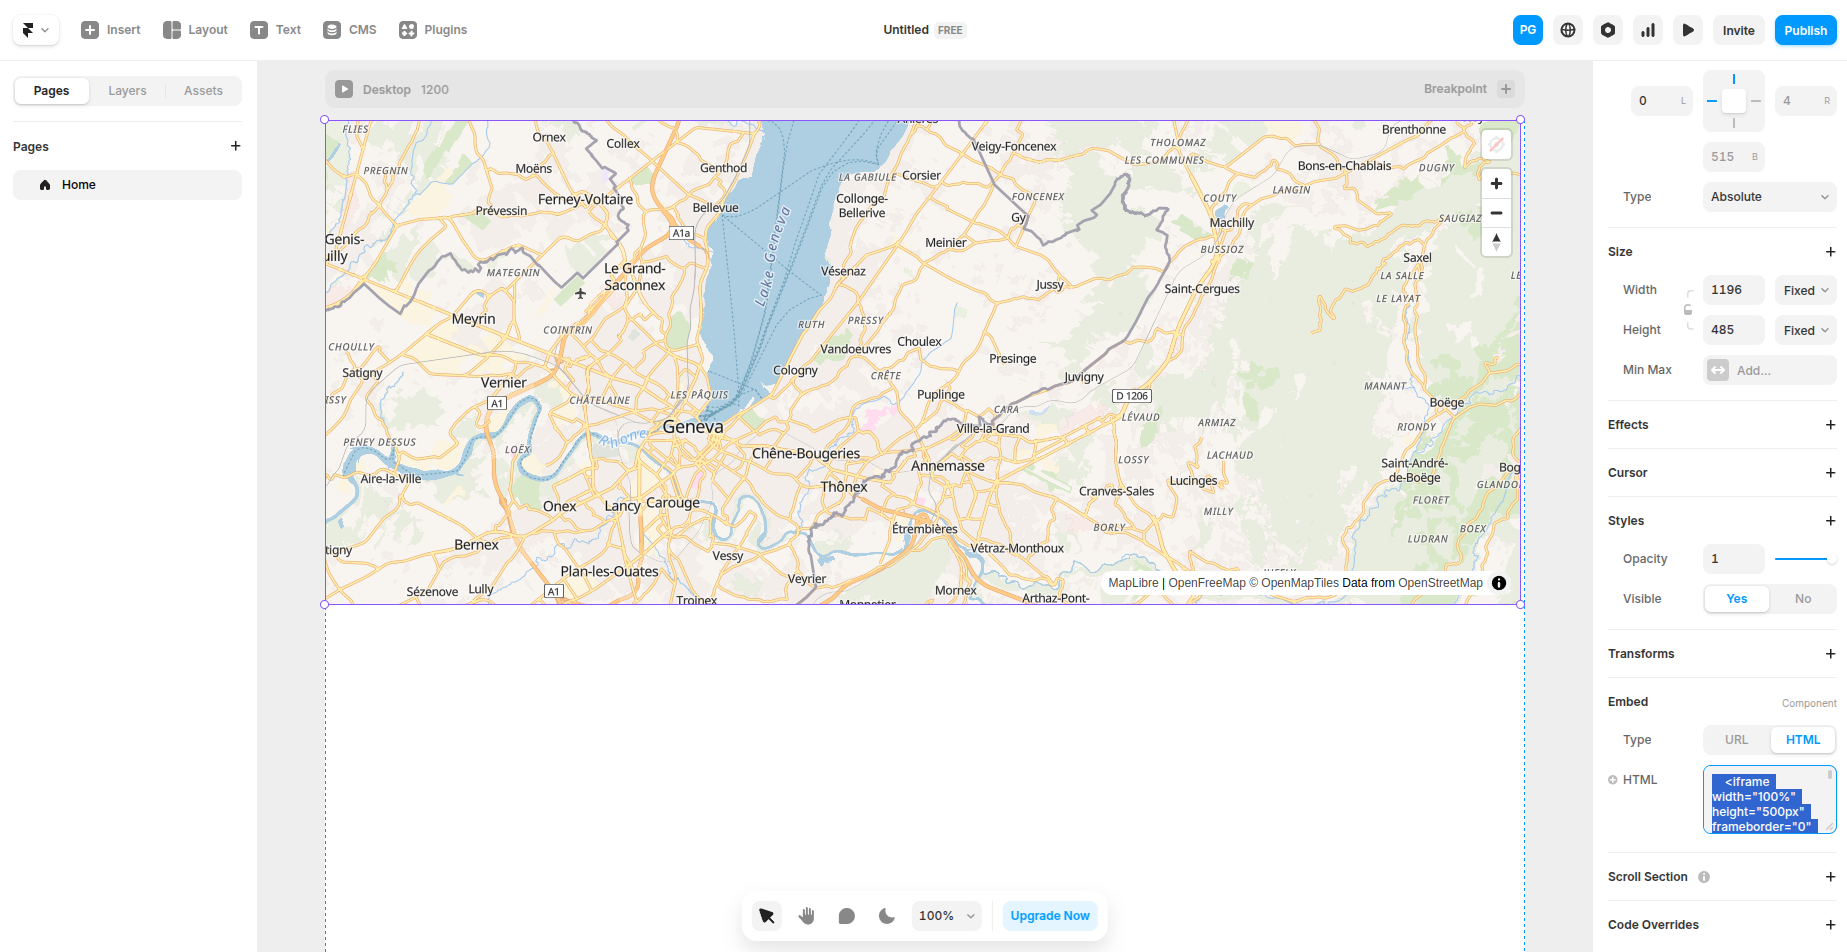
- Adjust the
"width"and"height"in the pasted code if needed.
That’s it! Your interactive map is ready. You can create and embed multiple maps the same way. All maps are mobile-friendly and require zero coding skills.
How to Add a Static Map to Framer
Sometimes embedding an interactive map isn’t possible—for example, due to layout constraints. In this case, you can insert a static map image linked to a full-screen interactive version.
Here’s how:
- Go to makememap.com and create an account if needed.
- Click “New Map” and set up your map as usual.
- Click “Publish” and copy the static map URL.
- Follow the instructions in this Framer community post to embed an image from a URL.
- Add a link to the image so that users can open the full-screen version when they click on it.
Why Use MakeMeMap?
- No plugins or API keys needed
- Free for small and medium projects
- Predictable pricing, unlike services like Mapbox which charge based on usage
- No coding skills required
If you have any questions, feel free to contact us at [email protected].